You are here: 1. Distribution System > 1.4. SALES Menu: Sales Order Processing > 1.4.3. Sales - Invoice Creation > 1.4.3.11. Managing Completed Invoices, Picking Slips and Quotes > Invoice Creation - File - Print Invoice > Processing Cash Payments
Processing Cash Payments

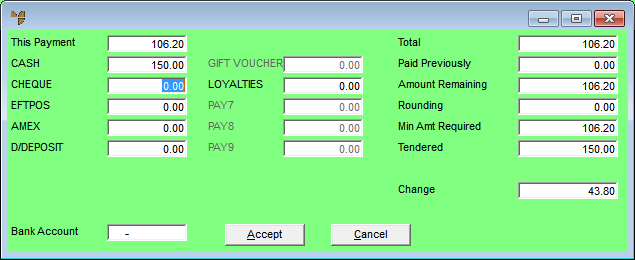
If Micronet has been configured to allow cash sales during invoice creation, the Payment screen displays.


Technical Tip

  • To allow cash sales, a debtor with the ID "CASH" must be setup in your Debtor master file, and the Cash Sale field on the Debtor File Update screen - Extra tab must be set to Yes (refer to "File - Debtor - Extra").
  • In addition, the Allow Cash Sales to be Paid field on the Invoicing Configuration screen must be set to Yes (refer to "Edit - Program - Invoicing"
Payment

The payment types displayed – e.g. Cash, Cheque, EFTPOS, Visa, Mastercard, Amex, Direct Deposit, and Gift Voucher – are setup in your system parameters and can be changed to suit your requirements (refer to "Edit Company - Edit - Payment Types").

The Paid Previously field shows any previous payment details for this sale. The Min Amt Required field shows the minimum amount the customer must pay.

To process the cash payment:

  1. Complete the steps in the process "Invoice Creation - File - Print Invoice".
  2. When the Payment screen is displayed, enter the amount of the payment for this order in the This Payment field.
  1. Enter the amount of the payment again – either against a single payment type or against a combination of payment types.
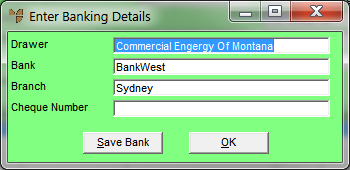
  1. Complete the following additional steps if using any of the following payment methods:


Technical Tip

  • If the customer is paying by EFTPOS or credit card using Tyro, enter the payment amount as an EFTPOS payment type.
  • If the customer wants cash out, increase the amount entered in the EFTPOS payment type field by the amount of cash out required. The cash out is indicated by the value in the Change field.
  • If you just want to generate a cash out, then create a zero dollar invoice with a payment amount.
  1. Select the Accept button.
  2. Continue with the remaining steps under "Invoice Creation - File - Print Invoice".

2.8 Feature

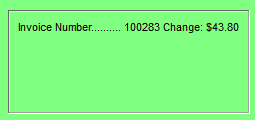
Micronet displays the change owed to the customer at the bottom left of the main Micronet screen, next to the invoice number.